


Check your mower’s oil level before every third mowing session by removing the dipstick, wiping it clean, reinserting it fully, and ensuring the oil sits between the minimum and maximum marks. Change the oil completely after every 50 hours of operation or at least once per season to learn more about preventing engine damage from debris buildup.
Sharpen your blade twice during the growing season using a 10-inch mill file at a 45-degree angle, maintaining the original bevel while removing nicks and dents that tear grass instead of cutting it cleanly. A dull blade stresses your lawn and makes your mower work harder, burning extra fuel and reducing cutting efficiency by up to 30 percent.
Replace your air filter annually and inspect it monthly during heavy use, tapping out loose debris and replacing paper filters that show oil saturation or visible damage. A clogged air filter chokes your engine, causing hard starts, power loss, and can reduce performance significantly with proper maintenance scheduling.
Clean grass clippings from underneath your deck after every few uses with a putty knife or deck scraper, preventing corrosion and buildup that reduces cutting performance and eventually rusts through the metal housing.
Here’s what I’ve learned from maintaining my own mower for over a decade: these simple tasks take less than two hours total per season but will extend your mower’s lifespan by years and save you hundreds in repair costs. Most breakdowns happen because owners skip basic maintenance, not because equipment fails. You don’t need mechanical expertise or expensive tools to keep your mower running like new.
Why Regular Lawn Mower Maintenance Matters (And What Happens When You Skip It)
I learned this lesson the hard way three summers ago when my mower sputtered to a stop halfway through cutting my front yard. I’d been putting off basic maintenance for months, telling myself I’d get to it “next weekend.” That procrastination cost me $280 in repairs and two weeks without a functioning mower during peak growing season. My neighbor kindly helped finish my lawn, but the embarrassment and expense stuck with me.
You might think skipping an oil change or ignoring a dull blade won’t make much difference, but the reality is quite different. When you neglect regular maintenance on your quality lawn mower, small issues snowball into major problems. One reader, Sarah from Ohio, shared that her father’s mower seized up completely after years without an oil change, turning a simple $25 maintenance task into a $450 engine replacement.
The good news is that regular DIY maintenance delivers impressive benefits that make the effort worthwhile. First, you’ll save serious money. Professional tune-ups typically cost between $75 and $150 per visit, while doing it yourself costs just $30 to $50 in supplies annually. Over a mower’s lifetime, that’s hundreds or even thousands of dollars back in your pocket.
Second, proper maintenance extends your equipment’s life dramatically. A well-maintained mower can easily last 10 to 15 years, compared to just 5 to 7 years for neglected machines. That means you’re getting double the value from your original investment.
Performance improvements are immediately noticeable too. Clean air filters and sharp blades cut grass cleanly rather than tearing it, resulting in a healthier, better-looking lawn. Your mower starts easier, runs smoother, and uses less fuel when everything’s working properly.
Finally, there’s the safety factor. Dull blades can kick up debris more violently, loose bolts can cause dangerous vibrations, and old fuel can create fire hazards. Regular maintenance keeps you and your family safe while you work.
Essential Tools and Supplies Every DIY Mower Maintainer Needs
Let me share something I learned the hard way during my first attempt at mower maintenance: showing up unprepared is frustrating and expensive. I made three trips to the hardware store for a simple oil change because I didn’t have the right tools. Now I keep everything organized in a dedicated toolbox, and maintenance takes half the time.
The good news? You don’t need a professional mechanic’s workshop to maintain your mower effectively. Here’s what you actually need to get started, with realistic prices based on what I’ve found at big-box stores and online retailers.
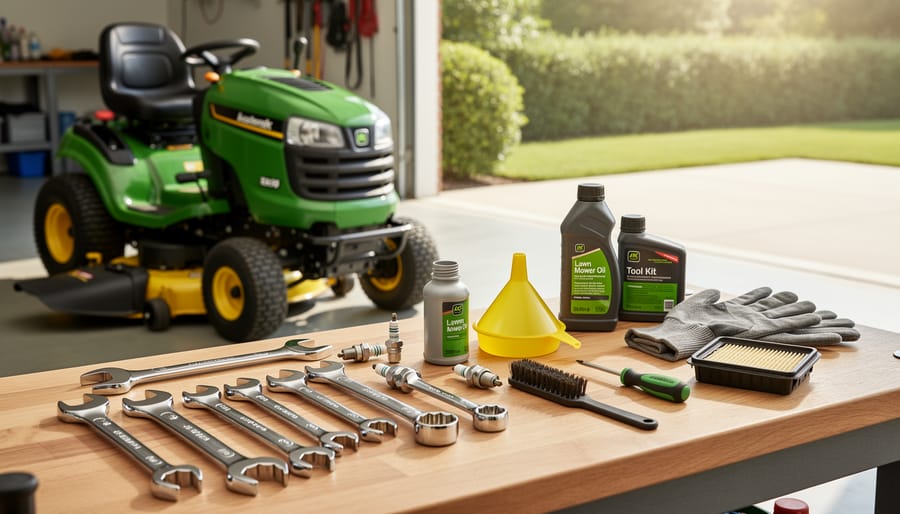
Your basic toolkit should include a socket wrench set with metric and standard sizes (around $20-35 at Harbor Freight or Home Depot). Most mower bolts are either 10mm or 13mm, but having a complete set prevents those annoying mid-project stops. Add a pair of adjustable wrenches ($15-20), which are perfect for blade removal and various adjustments.
For safety and cleaning, invest in heavy-duty work gloves ($8-12), safety glasses ($5-10), and a plastic putty knife or scraper ($3-5) for removing grass buildup. A wire brush ($4-6) is essential for cleaning spark plugs and terminals.
You’ll need maintenance supplies too. Stock up on your mower’s recommended oil (typically SAE 30 or 10W-30, about $8-12 per quart), spare air filters ($8-15 each), and at least two spark plugs ($3-8 each). I always keep extras because Murphy’s Law applies to DIY projects. Don’t forget an oil drain pan ($10-15) and a funnel ($3-5).
One investment I highly recommend is a blade sharpening file or angle grinder ($15-40). Sharp blades make an incredible difference in cut quality, and you’ll use these tools for years.
Total startup cost? Expect $100-175 for everything. Shop end-of-season sales at Lowe’s, Home Depot, or Amazon for significant savings. Many homeowners I’ve talked with mention finding great deals on starter tool kits that include most essentials in one package.
Safety First: Preparing Your Mower for Maintenance
Let me tell you something I learned the hard way: safety isn’t just a suggestion when working on lawn mowers. A few years back, I watched a neighbor try to inspect his mower blade while the spark plug was still connected. One accidental throttle touch later, and he had a close call that could’ve ended badly. That moment stuck with me, and it should stick with you too.
Before you grab a single wrench or tilt your mower, let’s talk about protecting yourself and avoiding completely preventable accidents. Trust me, these steps might seem overly cautious at first, but they take less than five minutes and could save you from a trip to the emergency room.
Start by letting your engine cool completely if you’ve recently used your mower. This means waiting at least 30 minutes after mowing. Hot engine components can cause serious burns, and you won’t be thinking clearly if you’re working on a machine that’s radiating heat.
Next, and this is absolutely critical, disconnect the spark plug wire. Pull it away from the spark plug and secure it so it can’t accidentally slip back into place. This simple action ensures your mower cannot start unexpectedly, even if you accidentally engage the throttle or pull the starter cord.
If you’re planning any work that involves tilting the mower or accessing the undercarriage, drain or stabilize the fuel first. Gas can spill out, creating a fire hazard and making a mess that’s surprisingly difficult to clean.
Finally, gear up properly. Wear heavy-duty work gloves when handling blades, safety glasses to protect your eyes from debris, and close-toed shoes. Keep a first-aid kit nearby, and always work in a well-ventilated area, preferably outdoors or in an open garage. Your safety is worth these extra minutes.
The Seasonal Maintenance Checklist That Keeps Repairs Away
Before Each Mowing Session (5-Minute Checks)
I learned this lesson the hard way during my first mowing season. I was so eager to get started each Saturday morning that I’d fire up my mower without a second thought. Then one afternoon, my blade hit a hidden rock, and I realized I’d been mowing with a already-damaged blade for weeks. That five-minute pre-mow check could have saved me from a costly replacement and some seriously uneven cuts.
Here’s what I now do before every single mowing session, and trust me, it’s become second nature:
Start by checking your oil level while the engine is cold and on level ground. Pull out the dipstick, wipe it clean, reinsert it fully, then check again. The oil should reach the full mark and look amber-colored, not black and gritty. Low oil can destroy your engine faster than almost anything else.
Next, give your blade a visual inspection. You don’t need to remove it, just tilt the mower slightly and look underneath. Check for major nicks, cracks, or bent edges. A dull blade tears grass instead of cutting it cleanly, leaving brown tips and making your lawn vulnerable to disease.
Walk around and clear any debris from the deck, discharge chute, and air vents. Grass clippings love to build up and block airflow, causing your engine to overheat. I once ignored this and nearly caused a small fire from dried grass near the muffler.
Give your tires a quick squeeze. They should feel firm and equal on all sides. Uneven tire pressure leads to scalping on one side of your cut.
Finally, test your safety features. Pull the bail handle and let go to ensure the blade stops within three seconds. These checks take just five minutes but prevent hours of frustration.
Monthly Maintenance Tasks
Here’s something I learned the hard way: skipping monthly maintenance during mowing season is like ignoring a check engine light. Sure, your mower might keep running for a while, but you’re setting yourself up for a frustrating breakdown right when your lawn needs cutting most. Let me walk you through the monthly tasks that’ll keep your machine humming along beautifully.
Start by cleaning the undercarriage, which honestly is my least favorite job, but it makes the biggest difference. Disconnect the spark plug wire first for safety, then carefully tip your mower on its side with the air filter and carburetor facing up to prevent oil from leaking where it shouldn’t. Use a putty knife or stiff brush to scrape away the packed grass clippings and debris. I’ve found that doing this on a warm day makes the dried grass come off much easier. A buildup of grass underneath doesn’t just reduce cutting efficiency; it traps moisture that leads to rust and can actually throw off your blade balance.
Next, check your air filter. A clogged filter chokes your engine and wastes fuel. For foam filters, wash them in warm soapy water, let them dry completely, then apply a light coating of clean engine oil. Paper filters just need a gentle tap to remove loose dirt, but replace them if they look dirty or damaged. Trust me, spending five dollars on a new filter beats spending hundreds on engine repairs.
Inspect all belts and cables for wear. Look for cracks, fraying, or glazing on belts. Cables should move smoothly without binding or sticking. I once ignored a fraying drive cable, and it snapped mid-mow, leaving me pushing a heavy self-propelled mower like a shopping cart across half an acre.
Finally, lubricate moving parts. Hit the wheel axles, height adjustment points, and any pivot points with a spray lubricant or light oil. Your mower will thank you with smoother operation and longer life.
Spring Start-Up Maintenance
There’s something almost ceremonial about that first spring mowing session, isn’t there? But before you can enjoy those perfect diagonal stripes across your lawn, your mower needs a little TLC after its winter hibernation. I learned this lesson the hard way during my second year as a homeowner when my mower sputtered and died fifteen minutes into the first cut of the season. Don’t make my mistake!
Start with the fuel system. Old gas that’s been sitting all winter can gum up your carburetor faster than you can say “repair shop.” Drain whatever’s left in the tank and replace it with fresh fuel. If you’re working with riding mowers, this step becomes even more important since they hold larger quantities. Add a fuel stabilizer to your new gas to keep things running smoothly.
Next up is your oil change. Pull out that dipstick and check the color. If it looks darker than strong coffee, it’s time for fresh oil. This simple ten-minute task can add years to your engine’s life.
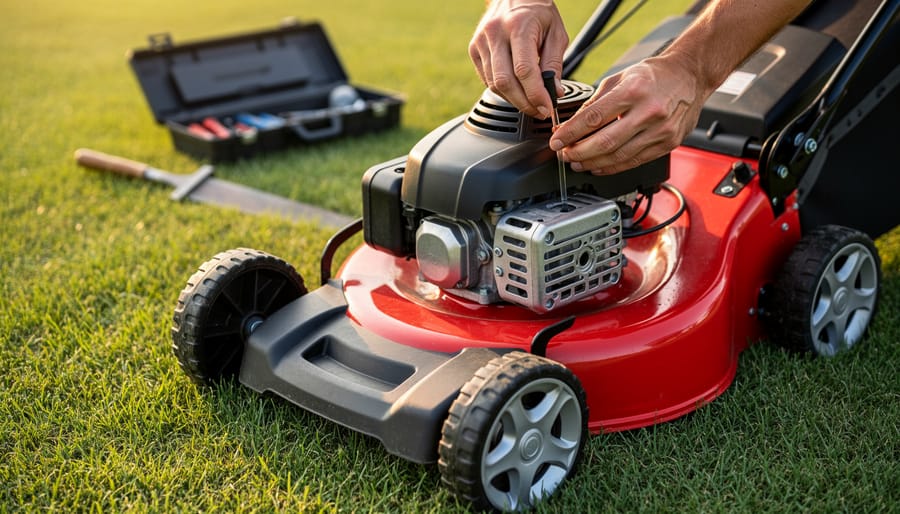
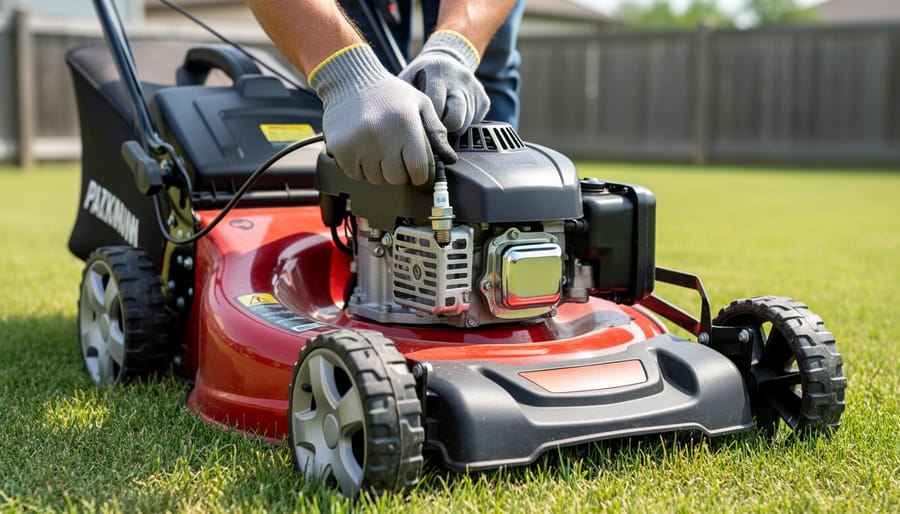
Don’t skip the spark plug inspection. Remove it, clean off any carbon buildup, and check the gap with a simple gauge from any hardware store. If it looks worn or corroded, replacement plugs cost just a few dollars and make a world of difference in starting performance.
Sharpen those blades for a clean cut that keeps your grass healthy. Dull blades tear rather than cut, leaving brown, ragged edges that stress your lawn.
Finally, if you’ve got electric start, charge that battery fully before your first mow. A reader recently shared that this saved them from an expensive replacement!
Fall Winterization Steps
When the grass stops growing and your last mow of the season is done, your mower deserves some love before its winter nap. Trust me, I learned this the hard way after spending three frustrating hours one spring trying to resurrect a neglected mower that refused to start.
Start with the fuel system, which is your biggest decision point. You can either add fuel stabilizer to a full tank and run the engine for five minutes to circulate it through the system, or completely drain the fuel. I prefer the stabilizer method for most modern mowers since it’s less messy and keeps seals lubricated. If you’re draining, run the engine until it sputters out completely.
Next, give your mower a thorough cleaning. Remove all grass clippings, dirt, and debris from the deck, undercarriage, and engine cooling fins. This prevents moisture buildup and rust during storage. While you’re at it, scrape off that stubborn caked-on grass underneath.
Change the oil one final time, even if you did it mid-season. Dirty oil contains acids and moisture that can corrode internal parts during months of sitting idle.
Finally, store your mower in a dry location, ideally on a piece of cardboard or wood to prevent moisture from concrete floors. Remove the battery if you have one, and store it somewhere warmer. Come spring, you’ll thank yourself for these simple steps.
How to Change Your Lawn Mower Oil (Even If You’ve Never Done It Before)
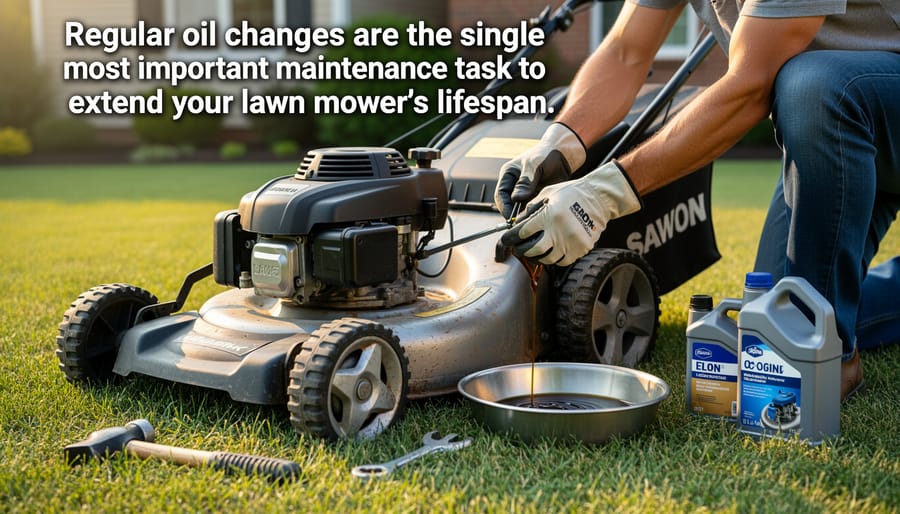
I’ll never forget the first time I changed my lawn mower oil. I put it off for two seasons because it seemed intimidating, and when I finally opened the drain plug, what came out looked like thick black sludge instead of oil. That’s when I learned this simple task could have saved me from potential engine damage. The good news? Changing your mower oil is actually one of the easiest maintenance tasks you can do, and I’m going to walk you through it step by step.
First, let’s talk about choosing the right oil. Most gas mowers use SAE 30 oil for warmer temperatures or 10W-30 for varying conditions. Check your owner’s manual to be sure, but these two types cover most situations. You’ll need about 15-20 ounces for a typical push mower. Grab an oil pan or old container to catch the used oil, plus a funnel for adding fresh oil.
Here’s the process: Run your mower for a couple of minutes to warm the oil, which helps it flow out more easily. Turn off the engine and disconnect the spark plug wire for safety. Position your mower on a flat surface and locate the oil drain plug underneath or the oil fill tube on top. Many readers have told me they prefer tipping the mower toward the oil fill tube rather than wrestling with a drain plug, which works great for smaller mowers.
Place your collection pan underneath and either remove the drain plug or carefully tip the mower to let oil drain from the fill tube. Let it drain completely, this takes about five minutes. Once empty, return the mower to its upright position, replace the drain plug if you removed one, and use your funnel to pour in fresh oil. Add oil slowly, checking the dipstick frequently to avoid overfilling.
The biggest mistake I see? Overfilling the crankcase. Too much oil can damage your engine just as easily as too little. Stop when the dipstick shows the proper level, usually between the two marks. Reconnect the spark plug wire, and you’re done. This 15-minute task every 50 hours or once per season will keep your mower running smoothly for years.
Blade Care: Sharpening, Balancing, and When to Replace
I learned this lesson the hard way when my mower started tearing grass instead of cutting it cleanly. Dull blades don’t just look bad—they actually stress your lawn and create entry points for disease. Keeping your blades sharp, balanced, and in good condition is one of the most impactful maintenance tasks you can do for both your mower and your yard.
First, let’s talk about sharpening. You should sharpen your blades at least twice per season, or more often if you’re mowing rough terrain or hitting the occasional rock. Remove the blade by disconnecting the spark plug first for safety, then use a socket wrench to loosen the center bolt. Mark which side faces down with a piece of tape—this matters for reinstallation.
For sharpening, you have options. A simple metal file works great if you’re patient and want a good arm workout. I personally use a bench grinder, which makes quick work of it. Hold the blade at the original cutting angle (usually around 30-45 degrees) and make smooth passes along the edge. You’re aiming for sharp enough to cut paper, not razor-sharp. Unlike manual reel mowers that need precise sharpening, rotary blades are more forgiving.
Here’s the part many folks skip: balancing. An unbalanced blade causes vibration that damages your mower’s engine and bearings. Hang the blade on a nail through the center hole or use a blade balancer. If one side dips, remove a bit more metal from the heavy side until it sits level.
When should you replace instead of sharpen? If your blade has cracks, deep gouges, is bent, or has been sharpened so many times that the sail (the angled part) is nearly gone, it’s replacement time. Thin blades can break during operation, creating a serious safety hazard. Quality blades are inexpensive insurance for both your safety and healthy grass.

Troubleshooting Common Issues Before They Become Expensive Problems
Won’t Start or Struggles to Start
I’ve been there on a Saturday morning, ready to tackle the lawn, only to have my mower refuse to cooperate. The frustrating pull-and-pull-again scenario is something most of us have experienced! The good news is that starting problems usually come down to a handful of fixable issues.
Start with your fuel. Old gasoline is the number one culprit I see in reader emails. Fuel degrades after about 30 days, forming gummy deposits that clog your system. Drain any old fuel and replace it with fresh gas. Add a fuel stabilizer if your mower sits for weeks between uses.
Next, check your spark plug. Remove it and look for heavy carbon buildup, cracks, or corrosion on the electrode. A dirty or worn plug prevents proper ignition. Clean it with a wire brush or replace it—they’re inexpensive and take minutes to swap.
Your air filter might be suffocating the engine. Remove it and hold it up to light. If you can’t see through it, it needs cleaning or replacement. A clogged filter restricts airflow, making starting nearly impossible.
Finally, if these steps don’t help, your carburetor may need cleaning. Stale fuel leaves sticky residue inside that blocks fuel flow. While carburetor cleaning takes more time, it’s absolutely doable for DIYers willing to follow some simple steps and watch a quick tutorial video.
Uneven Cutting or Poor Performance
Nothing’s more frustrating than pushing your mower across the lawn only to find it’s leaving uneven patches or struggling through grass that it used to handle easily. I’ve been there, and the good news is these issues usually have simple fixes you can tackle in your own garage.
Start with your blade. A dull blade tears grass instead of cutting it cleanly, leaving brown, ragged edges that make your whole lawn look unhealthy. Remove the blade and run your finger along the edge – if it feels rounded rather than sharp, it needs attention. You can sharpen it yourself with a file or bench grinder, or swap it out for a new one if it’s badly worn or nicked.
Cutting height matters more than you might think. If your mower suddenly seems to struggle, check that someone hasn’t accidentally adjusted the height settings. Most grass types thrive when cut at 2.5 to 3.5 inches, and cutting too low stresses both your lawn and your mower’s engine.
Don’t overlook deck buildup either. That crusty layer of dried grass clippings underneath affects airflow and cutting performance. Scrape it clean regularly with a putty knife after disconnecting the spark plug for safety.
Finally, check your tire pressure. Uneven tires create an uneven cut, and I learned this the hard way after wondering why one side of my lawn looked scalped. Most mower tires need 10-14 PSI, but always verify your model’s specifications.
Excessive Vibration or Strange Noises
If your mower starts sounding like it’s auditioning for a heavy metal band, don’t panic. Strange noises and excessive vibration usually signal fixable issues that you can tackle yourself.
Start by checking for loose bolts. After hours of operation, vibrations naturally loosen hardware. Turn off the engine, disconnect the spark plug, and grab your socket wrench. Check all visible bolts, especially around the blade mounting area and engine housing. I learned this lesson after ignoring a rattling sound for two mows—turns out three bolts were barely holding on!
Next, inspect your blade for balance. An unbalanced blade causes serious vibration and uneven cuts. Remove the blade and hang it on a nail through the center hole. If one side dips, it needs sharpening or replacing. This simple test has saved me from costly deck damage more than once.
Debris packed under the deck creates surprising noise and vibration. Scrape out grass clippings, sticks, and mud buildup regularly. Sometimes what sounds like a major problem is just dried grass creating interference.
For knocking sounds from the engine or grinding noises that persist after these checks, it’s time to call a professional. Bearing failures, crankshaft issues, or internal engine problems require specialized tools and expertise beyond typical DIY scope.
Money-Saving Tips From Years of DIY Maintenance
After years of maintaining my own mower and chatting with fellow DIYers, I’ve picked up some valuable money-saving tricks that really add up. One reader, Tom from Ohio, shared that he saves about $200 annually just by doing his own oil changes and blade sharpening instead of paying shop rates. That’s money better spent on seeds or garden tools!
Here’s the biggest secret: buying parts smartly makes all the difference. Generic air filters and spark plugs often work just as well as name-brand versions at half the cost. I always check online retailers and compare prices before heading to the local shop. You’d be surprised how much you can save with a quick search. Just make sure you’re getting quality parts, not the absolute cheapest option that might fail quickly.
Preventive care is where you really stretch those dollars. I learned this lesson the hard way when I ignored a loose bolt that eventually damaged my engine deck, costing me ten times what a simple tightening would have. Now I do a quick walk-around inspection before each mowing season, checking for loose parts, worn belts, and potential problems. Fifteen minutes of attention can prevent hundreds in repairs.
Another game-changer: keeping detailed maintenance records. I jot down dates for oil changes, blade sharpening, and part replacements in a simple notebook stored with my owner’s manual. This helps me spot patterns and catch issues early. Plus, when something does go wrong, I can reference what work was done and when, making troubleshooting much easier and helping me avoid duplicate repairs or unnecessary part purchases.
Taking care of your lawn mower doesn’t have to be complicated or intimidating. The truth is, even if you’re completely new to equipment maintenance, you can start small and build confidence with each task. Begin with something simple like cleaning the deck after mowing or checking your oil level before each use. These little habits take just minutes but make a tremendous difference in preventing costly repairs down the road.
I learned this lesson the hard way when I ignored a loose blade bolt for too long, which eventually damaged my mower’s spindle assembly. That expensive repair taught me that small maintenance efforts truly prevent big headaches. Now I actually enjoy the satisfaction of keeping my equipment in top shape, knowing I’m saving money and extending the life of my investment.
Remember, every expert started as a beginner. The tasks we’ve covered in this guide become second nature after you’ve done them a few times. You’ll develop your own routine and might even discover you have a knack for mechanical work.
What’s been your biggest lawn mower maintenance challenge? Have you tackled any repairs successfully, or are you still figuring out where to start? Share your experiences in the comments below. Your questions and stories help fellow DIY enthusiasts learn and grow together in this rewarding journey of home equipment care.